I haven't posted in a while, but I have been working on a few things. The platform is finished now:
You can see that I trimmed down the overall size from before, and I painted it and got the light panels done. It's 36" wide, and 40" from the front of the curve to the back edge. The curve is just an 18" radius circle. And it is 5" tall. I tried several other sizes and played around with the proportions, but this definitely looked the best given R2's size and foot print.
I primed it with the latex house primer I had around and then I put 2-3 coats of a Gloss Smoke Gray enamel on it with light sandings to 220grit in between. That gave it a very glossy smooth finish. I also filled and sanded all the counter sunk screw holes and everything else to make it seamless all over. It's very cool looking in person. I think I might put a timer on the cord to have the lights come on for an hour or two each night.
The top deck is 1/2" MDF. I drew the curve and then cut it with a small straight bore bit on my router and a circle guide/jig on the router. You could do it on a bandsaw with a circle jig, or even with a jig saw and then some careful sanding to even it out. Email me for more details about circle jigs on the router if you want. After I cut the basic shape, I flipped the deck over and using a bearing guide on my bit, I routed a 1/8" deep by 1/4" rabbet or channel around the edge. I cut a long piece of 1/8" fiberboard for the front and side faces. This wrapped around the base and fit into the rabbet. When I glued it on, the channel made a good strong bonding surface with hardly any seam where the edge piece meets the top deck. Sorry no pictures to make that clearer.
I drew 10" x 2 1/8" oblong cutouts on the edge piece, with the occasional full circle thrown in. I used a hole cutting bit for putting new door handles because it was handy and the proportions are right. That's the 2 1/8" circle, and you've probably got one of those bits around. Make sure the bit is sharp and cut straight down and cleanly into the fiberboard to minimize clean up. Once that edge piece was all cut out and glued onto the main deck. I flipped it over and glued the light diffuser plastic panels on the inside. This was a piece of plastic from the lighting section of the hardware store. I cut 4.5" strips of it and then glued them into the inside with some epoxy:
There's no need to be tidy or too careful here. I just made sure that the plastic panel laid down flush to the inside of the fiberboard so that no gap shows from the outside. I clamped these in while the glue set up.
The general look I was going for was this kind of Death Star corridor.
My recollection was that there were full circles interspersed in with the oblong cutouts in these light panels. But looking at this shot, I may be wrong. There's an oblong and shorter cutout at the bottom. But nothing like the full circle I put into my pattern. I thought I had seen that on some Star Wars set.
The lights were a bit tricky. You don't want any regular incandescents in there because they'll be too hot. LEDs aren't bright enough. I settled on some relatively cheap flourescent fixtures from Home Deport. It's hard to find anything shorter than 18" that's cheap. I wanted them simple, with one bulb, no extra covers, and not very bulky.
The lights were about $17 a piece

Originally I thought I might need four short ones, with one for each chamber between the cross members. But I couldn't find them short, cheap and powerful enough. Here I just cut some cutouts into the cross members (1/2" plywood) so the lights can go right through them. I tried two light, but it was too dim and there were dark spots. This configuration works pretty well.
And a closer shot here. To attach these, I just put a screw right through the fixture body and into the bottom of the deck, without going through to the top of the deck:

I'm happy with the results:


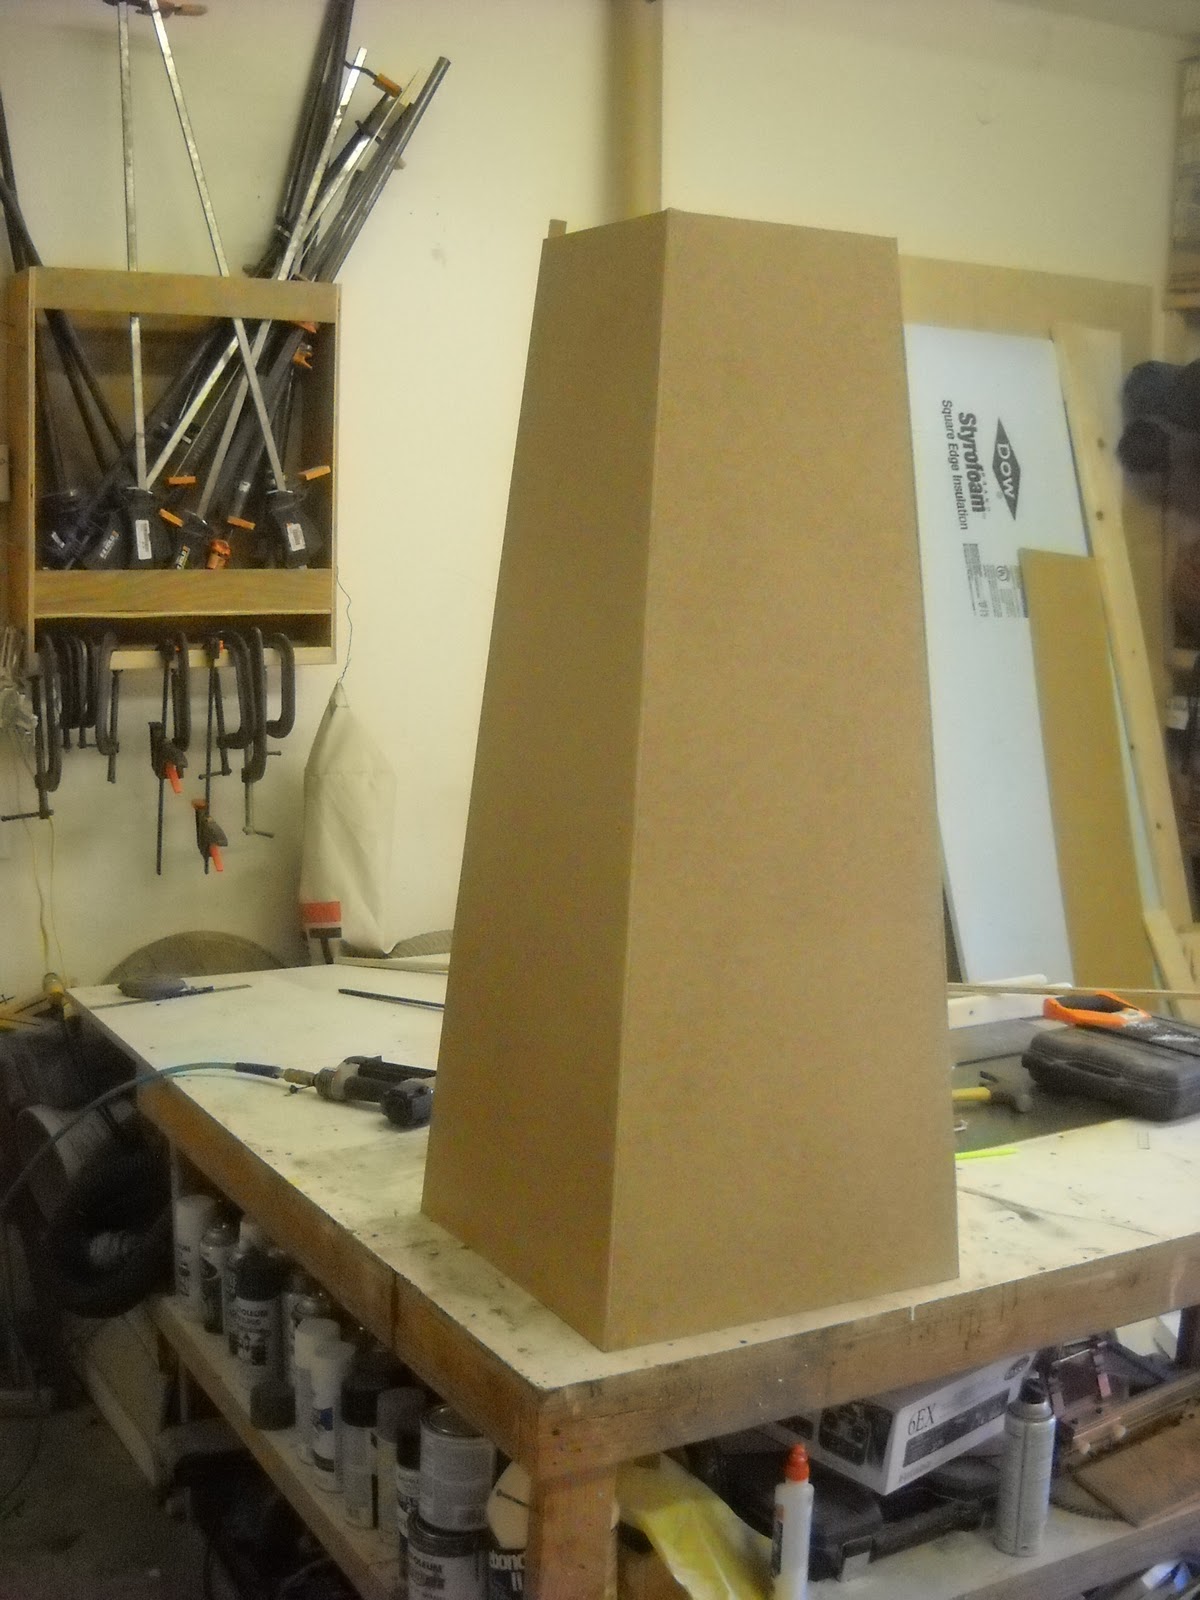

 Pretty cool for a couple of hours work. I'll get these all attached and get the edges cleaned up. I think I'll make a mount on the base so that the obelisk slides down onto a dowel or something so I can take it apart easily. Then I'll prime it all, paint it, weather it, and put some Egyptian heiroglyphics on it.


